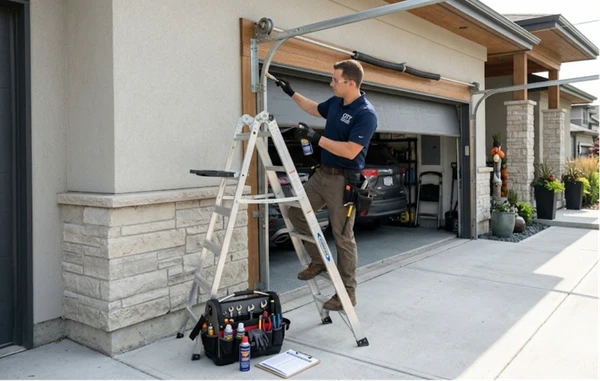
A customer called a garage door company I know about six months ago because her door had started making a loud clunking sound at the top of each travel cycle. She'd been living with it for a couple of months, figured it was normal wear, maybe something that could wait. By the time someone came out, the top bracket on the left side had cracked through - a stress fracture that had been working its way across the metal for weeks. The roller was catching in the track on every pass because the bracket had shifted the alignment just enough to cause interference.
Two-hour repair. Would have been a twenty-minute repair if she'd called when the noise started.
That's the bracket story in miniature. Small hardware, gradual failure, ignored until the door makes the decision for you. Here's what to know before it gets that far.
What brackets actually are and why there are so many types
A garage door system uses brackets in at least four distinct locations, and they're not interchangeable - they do different jobs and carry different loads. Understanding the basic geography helps with diagnosis.
The vertical tracks running up each side of the door opening are held to the wall framing by mounting brackets - L-shaped or Z-shaped steel pieces bolted into the structural framing. These are the brackets that loosen from vibration over years of use. They're also the ones that are easy to miss because they don't visually announce their failure the way a bent roller bracket does.
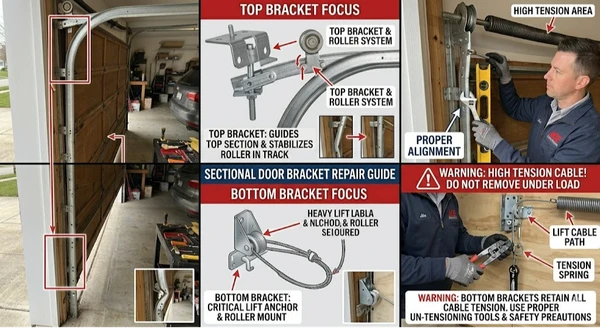
At the very top corners of the door panel are top roller brackets - also called top fixtures. These hold the roller that guides the door through the curved radius section at the turn between vertical and horizontal track. They're attached directly to the door panel and experience significant mechanical stress every cycle as the door changes direction. They can bend, crack at the weld, or have their fastener holes strip out over time.
At the floor-level corner of the door, on each side, are bottom brackets - also called bottom roller brackets or cable anchor brackets. These do two things simultaneously: they hold the bottom roller that keeps the door seated in the vertical track, and they anchor the lift cable that connects to the spring system. This combination of functions means the bottom bracket is under substantially higher load than anything else on the door.
Along the top edge of the top panel, centered, is the operator bracket or center bracket - the piece the opener J-arm attaches to. When this bracket is undersized or the opener is pulling against a panel that isn't reinforced, you get door flex and eventual panel damage. Many garage doors have a reinforcement strut across the top panel specifically because of the stress concentrated at this point.
Top brackets: what goes wrong and what to do
Top bracket failure is usually gradual. The first sign is often noise - a creak or slight metallic groan that happens at the top of the door's travel, specifically when the rollers are transitioning through the curve. Not a grinding throughout, but a sound that happens right at that moment. If you hear that consistently and it's getting worse over time, the top bracket is worth a close look.
What you're looking for: any visible crack in the bracket metal, particularly at welds or the bend point. Elongated bolt holes where the bracket fastens to the door panel - if the bolt can be wiggled around in the hole, that hole has been worked loose. Any visible bend in the bracket body. Rust that's progressed to actual pitting rather than surface oxidation.
Top bracket replacement is legitimate DIY work for most people. The load on the top bracket is mechanical rather than under spring tension - meaning it doesn't store energy that will release violently when you remove it. Standard procedure: unplug the opener, prop the door in the open position with the door secured using locking pliers on the track below the bottom roller, remove the fasteners holding the bracket to the door panel, swap it for the new bracket, and refasten. Take a photo of the old bracket orientation before you remove it so you know exactly how the new one should sit.
One thing worth getting right: top brackets are sized specifically for door height and door weight. A bracket from a 7-foot door isn't necessarily correct for an 8-foot door. Bring the old bracket to the supplier, or note the door specs (height and section count) before ordering. The roller stem length on the top bracket also matters - it needs to reach the track properly with the door in both travel positions.
Bottom brackets: the one that requires a specific warning
The bottom bracket is where this guide has to be direct about something, because a lot of people don't get clear information on this and then end up in a genuinely dangerous situation.
The bottom bracket anchors the lift cable. The lift cable runs up to the spring system - either torsion springs across the top of the opening or extension springs running parallel to the horizontal tracks. That spring system is storing the mechanical energy equivalent of the door's full weight in wound metal. A standard two-car garage door can weigh 300 to 400 pounds. All of that potential energy is sitting in those springs, held in check by the cable, which terminates at the bottom bracket.
When the door is in the closed position, the cable is under tension. When you loosen or remove the bottom bracket, you are releasing that cable attachment. What happens next depends on a lot of factors, and none of them are predictable enough to make this a DIY task for anyone who hasn't been trained in spring tension management.
The bracket or cable can snap back. The door can drop suddenly on one side. The spring can unwind with force. These aren't theoretical risks - they're documented injuries that happen regularly to homeowners who looked at the bottom bracket, thought it didn't look complicated, and proceeded anyway.
Do not touch the bottom brackets. That's the whole message. If the bottom bracket is bent, broken, or otherwise failing - and you'll know because the cable won't be sitting correctly and the door will be running unevenly - call someone.
Signs of bottom bracket failure that should prompt an immediate call: the lift cable has come off the bottom bracket drum or is visibly displaced, the bracket is visibly bent or cracked, the door is sagging on one side and not running level, or you can see the cable is frayed near the attachment point. Don't keep running the door. Don't try to push the cable back into position. Stop using the door and call.
Mounting brackets: the easy fixes people overlook
The wall-mounted track brackets that most people don't think about are actually some of the most impactful maintenance items on the door. They loosen. They always loosen, gradually, from the constant vibration of thousands of door cycles. And a loose mounting bracket lets the track it's holding drift slightly, which becomes a misalignment problem, which becomes a noise and wear problem.
Testing them is genuinely simple - grab each bracket with your hand and push firmly in multiple directions. It should feel like pushing against a wall. Any movement, any play, means the bolt needs tightening. If the bolt tightens but the bracket still moves, the lag screw hole in the framing has elongated or the wood has softened. In that case, the bracket needs to be repositioned to a fresh section of solid framing material.
Tightening loose mounting brackets takes maybe fifteen minutes and a socket wrench. It costs nothing. It quietly prevents a category of track problems that seem more serious than they are because nobody checked the brackets first.
The operator bracket: what it is and when it matters
The center bracket at the top of the garage door panel - where the opener's J-arm attaches - is worth mentioning because it's a source of problems that get misdiagnosed as opener problems.
When the opener pulls the door and the attachment point isn't properly reinforced, the top panel flexes. You'll see it if you watch the top section carefully during a door cycle - it bows slightly inward as the opener engages. Over time that flex cracks the panel. It also puts the door in the wrong position relative to the track on every cycle, which creates wear on rollers and hinges accelerated well beyond normal.
The fix is an opener reinforcement bracket - a steel brace that spans the top panel and distributes the opener's pull force across the full width rather than concentrating it at one point. These are standard hardware and relatively inexpensive. If your top panel has visible creasing, cracking, or if you can see flexing when the door cycles, this is what you need.
What repairs actually cost
A few reference points for professional bracket work:
|
Service |
Rough Cost |
|
Top roller bracket replacement |
$80 – $150 per bracket |
|
Bottom bracket replacement |
$100 – $200 (includes cable adjustment) |
|
Mounting bracket tightening / adjustment |
Often included in a tune-up |
|
Opener reinforcement bracket installation |
$80 – $180 |
|
Full bracket inspection and tune-up |
$75 – $150 |
Bottom bracket work runs on the higher end of those ranges because it involves relieving spring tension before the bracket can be safely removed - that step adds time and requires specific tools.
The summary version, if you want it short
Top brackets and mounting brackets are DIY-accessible for most homeowners with basic tools and reasonable care. Inspect them once a year, tighten what's loose, replace what's cracked or stripped.
Bottom brackets are not DIY work. Not sometimes, not "if you're careful." The spring tension makes this a professional task every time.