In 1990, Congress passed a law that changed residential garage door safety permanently. The Consumer Product Safety Improvement Act that year made automatic-reverse mechanisms mandatory on all residential garage door openers - first as contact-based reversal (the door had to physically touch something before stopping), then, by January 1993, as a contactless system. The sensor technology had to detect an obstruction before the door ever reached it.
The reason for that second standard was obvious to anyone who thought about what "contact-based reversal" meant in practice. The door still had to hit whatever was in its path - a child, a pet, someone's leg - before the reversal triggered. On a door that can weigh between 150 and 500 pounds and exert over 150 pounds of closing pressure, contact-based detection was better than nothing but not good enough.
That 1993 requirement gave us the sensors that now sit near the floor on either side of your garage door opening. Most homeowners have walked past them thousands of times without thinking about them. Here's what they're actually doing.
The basic mechanism - how these sensors work
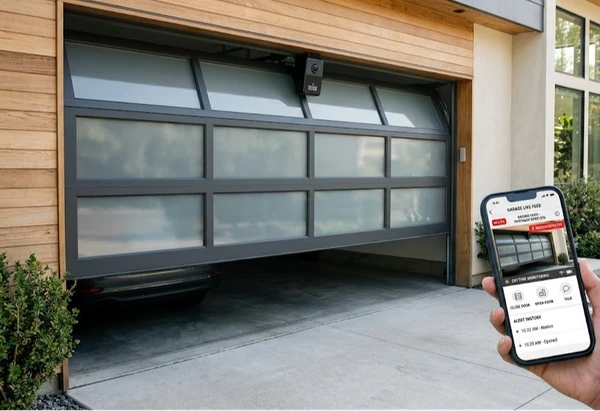
There are two units, one on each side of the door opening, mounted about 4 to 6 inches above the floor. They're a matched pair and they don't work independently.
One unit is the transmitter. It emits a continuous beam of infrared light - invisible to the human eye - directly across the door opening toward the other unit. The other unit is the receiver. Its entire job is to detect that beam. It immediately sends a different signal to the logic board: path is blocked. If the door is closing, it stops and reverses to the full open position. The door never touches the obstruction. The entire detection and reversal happens in fractions of a second.
Most systems use infrared wavelengths that aren't easily confused with visible light sources, but bright direct sunlight on the receiver lens can overwhelm the sensor's ability to detect the beam - which is why doors sometimes behave strangely in late afternoon when the sun is low and shining directly into the garage opening. It's a known limitation, not a malfunction.
The two sensors have indicator lights - typically one green and one red or amber, depending on the manufacturer. On a properly aligned system, both lights are steady. If either is blinking or off, the beam isn't connecting properly.
Why they fail - the three causes
Sensors aren't complicated devices but they sit 4 to 6 inches off the ground in a garage environment, which means they're exposed to everything that happens at floor level. Three failure modes account for almost all sensor problems.
Misalignment is the most common by a significant margin. The sensors are mounted on adjustable brackets, which means they can be bumped, kicked, or nudged out of position without much force. A trash can moved too quickly, a bike wheel that grazed one on the way out, kids who backed into one without noticing - any of these can shift a sensor enough that the beam no longer hits the receiver correctly. The symptom is the door refusing to close with the opener, or closing partway and reversing for no visible reason. The fix is realigning the sensors until both indicator lights show steady - loosen the mounting bracket slightly, adjust the sensor angle until the lights stabilize, tighten the bracket back down. It takes about five minutes.
Dirty lenses are the second cause. The sensors have small glass or plastic lenses that the beam passes through. Dust, spider webs, dried mud splashed up from the floor, condensation residue - all of these accumulate on a lens that sits inches off the ground in a working garage. A dirty transmitter lens weakens the beam. A dirty receiver lens may not detect it cleanly. Clean both lenses with a soft cloth and a mild glass cleaner - nothing abrasive - and see if the problem resolves before going further in the troubleshooting process.
Damaged wiring is less common but harder to fix. The sensors connect to the opener's logic board via low-voltage wiring that runs along the wall and ceiling. In garages where bikes, ladders, or storage items are moved frequently, those wires get damaged - nicked by a tool, pinched by something stored against the wall, or chewed through by a rodent that decided the wiring was interesting. A wire break anywhere in the circuit causes the sensor system to read as interrupted permanently, meaning the door won't close with the opener at all. Diagnosing this requires tracing the wire for visible damage. Fixing it requires splicing in a new section or, in bad cases, running new wire.
What the blinking light is actually telling you
Different manufacturers use different blink patterns to communicate different fault codes, but the general principle is consistent. A rapidly blinking light on the opener motor unit (usually the ceiling-mounted unit) typically indicates a sensor fault - the system is telling you the infrared beam path isn't confirmed.
Count the blinks and check your opener manual. LiftMaster and Chamberlain systems, for example, use specific blink counts to indicate different fault types. Four blinks on their units often indicates sensor wiring issue; ten blinks can indicate sensor misalignment. This information is in the manual, which most people throw away, and also available on the manufacturer's website if you have the model number from the label on the motor unit.
The faster, easier diagnostic: look at the lights on the sensors themselves. Both steady means the beam is connected. Either blinking or off means it isn't. Start with cleaning the lenses, then realigning, then check the wiring. That sequence addresses 95% of sensor failures in that order.
Testing whether your sensors actually work
Knowing your sensors haven't caused any problems lately isn't the same as knowing they're working. The distinction matters because a sensor that's failed closed - meaning it's reporting beam-connected even when it isn't - won't prevent the door from closing on something.
Test it actively. Close the door with the remote or wall button, then when it's a foot or two from the floor, roll a cardboard box into the path of the sensors. The door should stop and reverse immediately. If it keeps closing and crushes the box, your sensors are not functioning correctly and this is a safety problem that needs to be addressed before the door is used again.
Do this test after any sensor cleaning, realignment, or wiring work. Do it any time the door has been bumped or if you notice the sensors have been moved. It takes thirty seconds and it's the only way to actually confirm the system is working rather than just assuming it is.
What happens when they're bypassed or ignored
The override function on most garage door openers allows the door to close without sensor confirmation - it's there for situations where the sensors have failed and you need to use the door temporarily while you arrange a repair. It works by pressing and holding the wall button continuously while the door closes.
Some people discover this workaround and stop using the sensors altogether. They find the sensors are misaligned, the door keeps reversing on its own, and rather than fix the underlying problem they just hold the button every time.
This is genuinely dangerous. The sensors are the reason the door doesn't close on a child or pet who runs under it at the wrong moment. Permanently bypassing them to avoid the inconvenience of a five-minute realignment job is trading a minor annoyance for a serious safety risk.
If your sensors keep going out of alignment, that's its own problem worth addressing - loose mounting brackets, vibration causing repeated drift, sensors mounted where they're frequently bumped. Those are fixable. Bypassing the sensors as the solution is not.
When to replace rather than repair
Sensors are not expensive. A replacement set for most residential openers runs $25 to $60 and they're widely available for all major brands - LiftMaster, Chamberlain, Genie, Craftsman. Installation requires connecting two wires on each sensor and adjusting the alignment. Most homeowners with any mechanical inclination can do it.
Replace the sensors when: the indicator lights show no response after cleaning and realignment, the wiring is visibly damaged beyond a simple splice repair, or the sensors are over ten years old and you're having recurring problems despite cleaning and adjustment. The components do wear over time - the infrared emitter in the transmitter weakens, the photodiode in the receiver becomes less sensitive. Cleaning and realignment won't fix that.
One installation detail worth knowing: sensors from different manufacturers are generally not interchangeable. A LiftMaster sensor works with a LiftMaster opener. A Chamberlain sensor works with a Chamberlain opener. Match the brand when buying replacements, or confirm compatibility explicitly before purchasing.
If your sensors aren't responding to cleaning and realignment, or if the door is failing the cardboard box test, DoorFixy can diagnose and replace them quickly - usually within a single service visit.